Product successfully added to your shopping cart
There are 28 items in your cart. There is 1 item in your cart.
ASTM A512 SA512 Tube
-
Carbon Steel Pipes & Tubes
- ASTM A106 SA106 Pipe
- ASTM A53 SA53 Pipe
- ASTM A135 SA135 Pipe
- ASTM A139 SA139 Pipe
- ASTM A179 SA179 Tubes
- ASTM A210 SA210 Tubes
- ASTM A333 SA333 Pipe
- ASTM A334 SA334 Pipe
- ASTM A500 SA500 Pipe
- ASTM A501 SA501 Pipe
- ASTM A512 SA512 Tube
- ASTM A513 SA513 Tube
- ASTM A517 SA517 Tube
- ASTM A519 SA519 Tube
- ASTM A671 SA671 Pipe
- ASTM A672 SA672 Pipe
- ASTM A252 Steel piling pipe
- Carbon Steel Seamless Pipe
- Carbon Steel Pipe Japan
- Carbon Steel Pipes Europe
- Carbon Steel Pipe China
-
Stainless Steel Pipes & Tubes
- Stainless Steel Tube, Tubing & Pipe
- ASTM A271 ASME SA271 Pipes/ Tubes
- ASTM A312 ASME SA312 Pipes/ Tubes
- ASTM A358 ASME SA358 Pipes/ Tubes
- ASTM A376 ASME SA376 Pipes/ Tubes
- ASTM A409 ASME SA409 Pipes/ Tubes
- ASTM A430 ASME SA430 Pipes/ Tubes
- ASTM A632 ASME SA632 Pipes/ Tubes
- ASTM A778 ASME SA778 Pipes/ Tubes
- ASTM A813 ASME SA813 Pipes/ Tubes
- ASTM A814 ASME SA814 Pipes/ Tubes
- ASTM A826 ASME SA826 Pipes/ Tubes
- ASTM A851 ASME SA851 Pipes/ Tubes
- ASTM A213 ASME SA213 Pipes/ Tubes
- ASTM A249 ASME SA249 Pipes/ Tubes
- ASTM A268 ASME SA268 Pipes/ Tubes
- ASTM A269 ASME SA269 Pipes/ Tubes
- ASTM A270 ASME SA270 Pipes/ Tubes
- ASTM A511 ASME SA511 Pipes/ Tubes
- ASTM A688 ASME SA688 Pipes/ Tubes
-
Alloy Steel Pipes & Tubes
-
Alloy Steel Tubes
- ASTM A213 T1 Alloy Steel Tube
- ASTM A213 T2 Alloy Steel Tube
- ASTM A213 T5 Alloy Steel Tube
- ASTM A213 T5b Alloy Steel Tube
- ASTM A213 T5c Alloy Steel Tube
- ASTM A213 T9 Alloy Steel Tube
- ASTM A213 T11 Alloy Steel Tube manufacturer and suppliers
- ASTM A213 T12 Alloy Steel Tube
- ASTM A213 T17 Alloy Steel Tube
- ASTM A213 T21 Alloy Steel Tube
- ASTM A213 T22 Alloy Steel Tube
- ASTM A213 T23 Alloy Steel Tube
- ASTM A213 T24 Alloy Steel Tube
- ASTM A213 T36 Alloy Steel Tube
- ASTM A213 T91 Alloy Steel Tube
- ASTM A213 T92 Alloy Steel Tube
- ASTM A213 T122 Alloy Steel Tube
- ASTM A213 T911 Alloy Steel Tube
- ASTM A513 Grade 8620 Alloy Steel Tube
- ASTM A513 Grade 4130 Alloy Steel Tube
- ASTM A513 Grade 4118 Alloy Steel Tube
- ASTM A513 Grade 4140 Alloy Steel Tube
- ASTM A513 Grade 8630 Alloy Steel Tube
-
Alloy Steel Pipes
- ASTM A335 P1 Alloy Steel Pipe
- ASTM A335 P2 Alloy Steel Pipe
- ASTM A335 P5 Alloy Steel Pipe
- ASTM A335 P5b Alloy Steel Pipe
- ASTM A335 P5c Alloy Steel Pipe
- ASTM A335 P9 Alloy Steel Pipe
- ASTM A335 P11 Alloy Steel Pipe Manufacturer & Suppliers
- ASTM A335 P12 Alloy Steel Pipe
- ASTM A335 P15 Alloy Steel Pipe
- ASTM A335 P21 Alloy Steel Pipe
- ASTM A335 P22 Alloy Steel Pipe Manufacturer and suppliers
- ASTM A335 P23 Alloy Steel Pipe
- ASTM A335 P24 Alloy Steel Pipe
- ASTM A335 P36 Alloy Steel Pipe
- ASTM A335 P91 Alloy Steel Pipe
- ASTM A335 P92 Alloy Steel Pipe
- ASTM A335 P122 Alloy Steel Pipe
- ASTM A335 P911 Alloy Steel Pipe
- Alloy Steel Pipe & Tube Specification
-
Alloy Steel Tubes
- Special Steel Grades Pipes & Tubes
- API 5L Pipe
- Titanium Pipes & Tubes
- Welded/ ERW Pipes
- Mild Steel Pipes & Tubes
- Ductile Iron Spun Pipe & Ductile Iron Flanged Pipe Cast
- Capillary Tube| Capillary Tubing
- Boiler Tube
- Heat exchanger tubes
- Cupro Nickel Tube
- Aluminium Tube
- Corten Steel Pipes & Tubes
- EIL Approved Pipes
- IBR Pipe/ Tube & Non IBR Pipe/ Tube
- Black Pipes
- Galvanised Steel Pipes/ GI Tubes
- SS Coiled Tubing/ Tubes
- SS Electropolished Pipes/ Tubes
- SS Rectangular Pipes/ Tubes
- SS Square Pipes/ Tubes
- Full comparison of the DIN and EN standards for pipes/tubes
- Stainless Steel Pipe grades comparison


Surplus stock of Steel Pipes & Tubes:
Specialist in:
Offering best price on:
Widest inventory of:
SS,CS,Alloy Steel Pipe Prices
- » Steel Pipe/ Tube Price Iran
- » Steel Pipe/ Tube Price USA
- » Steel Pipe/ Tube Price India
- » Steel Pipe/ Tube Price China
- » Steel Pipe/ Tube Price Indonesia
- » Steel Pipe/ Tube Price UK
- » Steel Pipe/ Tube Price UAE
- » Steel Pipe/ Tube Price Malaysia
- » Steel Pipe/ Tube Price Singapore
- » Steel Pipe/ Tube Price South Korea
- » Steel Pipe/ Tube Price Saudi Arabia
- » Steel Pipe/ Tube Price Japan
- » Steel Pipe/ Tube Price Thailand
- » Steel Pipe/ Tube Price Bangladesh
- » Steel Pipe/ Tube Price Canada
- » Steel Pipe/ Tube Price Germany
- » Steel Pipe/ Tube Price Australia
- » Steel Pipe/ Tube Price Nigeria
- » Steel Pipe/ Tube Price Iraq
- » Steel Pipe/ Tube Price Turkey
- » Steel Pipe/ Tube Price Brazil
- » Steel Pipe/ Tube Price Vietnam
- » Steel Pipe/ Tube Price South Africa
- » Steel Pipe/ Tube Price Egypt
- » Steel Pipe/ Tube Price Bahrain
- » Steel Pipe/ Tube Price France
- » Steel Pipe/ Tube Price Mexico
- » Steel Pipe/ Tube Price Netherlands
- » Steel Pipe/ Tube Price Taiwan
- » Steel Pipe/ Tube Price Spain
- » Steel Pipe/ Tube Price Philippines
- » Steel Pipe/ Tube Price Pakistan
- » Steel Pipe/ Tube Price Kuwait
- » Steel Pipe/ Tube Price Norway
- » Steel Pipe/ Tube Price Oman
- » Steel Pipe/ Tube Price Qatar
- » Steel Pipe/ Tube Price Russia
- » Steel Pipe/ Tube Price Slovakia
- » Steel Pipe/ Tube Price Poland
 View larger
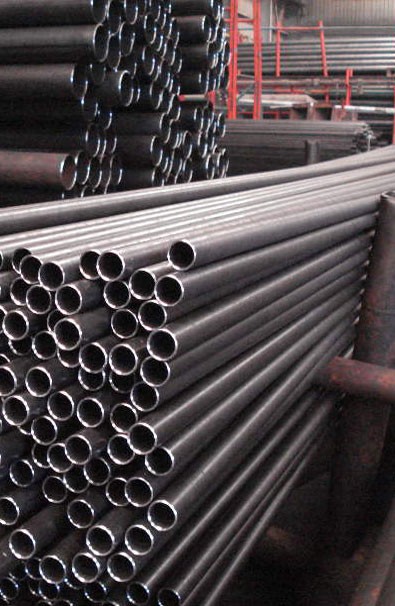
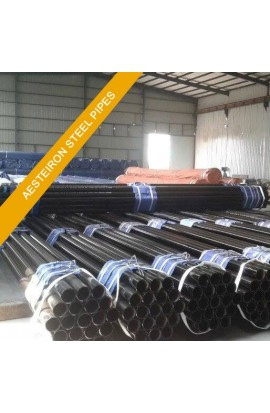
ASTM A512 Cold-Drawn Buttweld Carbon Mechanical Tubing suppliers
ASTM A512 Cold-Drawn Buttweld Carbon Mechanical Tubing
New
More info
ASTM A512 – Cold Drawn Buttweld
COLD DRAWN BUTTWELD MECHANICAL TUBINGASTM A-512
Buttweld mechanical tubing is made from buttwelded or continuous welded tube hollows, drawn to size with a mandrel. It is produced in OD sizes ranging from 1/4 inch to 3-1/2 inch OD. The tubing is cold drawn for the purpose of obtaining dimensional accuracy and improved mechanical properties. Applications include axles, truck and railroad parts, and many more where weight-to-strength ratio and tolerances are important.
ASTM A512 ASME SA512 Standard for Cold-Drawn Buttweld Carbon Steel Mechanical Tubing covers cold-drawn buttweld carbon steel tubes for use as round, square, rectangular or special shape mechanical tubing. The carbon steel can be made unless a specific type of melting process is required by the purchaser.
This specification covers cold-drawn buttweld carbon steel tubes for use as mechanical tubing.
This specification covers round, square, rectangular, and special shape mechanical tubing.
Round tube size ranges covered are outside diameters up to 3 1/2 in. (88.9 mm) and wall thickness from 0.035 to 0.500 in. (0.89 to 12.70 mm).
Diameter
(Including Ovality) Mandrel Down
|
OD Size
Range Inches |
OD
Tolerance Inches |
ID
Tolerlance Inches |
|
0.500 to 1.499
|
+0.005
|
+0.000
|
|
– 0.000
|
– 0.005*
|
|
|
1.500 & Over
|
+0.010
|
+0.000
|
|
– 0.000
|
– 0.010
|
*Under 0.500 inch ID a greater tolerance may be required.
STANDARD DIMENSIONAL TOLERANCES — Round Tubing
Wall
Mandrel drawn plus or minus 7 percent, except when walls are lighter than 0.156 inch, the tolerance is plus or minus 10 percent.
Length
Mandrel Drawn
|
Length Range
Fleet |
OD Size Range
Inches |
Tolerance
Inches |
|
4 and less
|
to 2.000
|
+1/16-0
|
|
4 and less
|
2.001 & Over
|
+3/32-0
|
|
4 to 10
|
to 2.000
|
+3/32-0
|
|
4 to 10
|
2.001 & Over
|
+1/8 -0
|
|
Over 10
|
All
|
+1/8 -0
|
ROUND TUBING TOLERANCES
Straightness — Mandrel Drawn
0.030 inch maximum deviation from a straight line in a three foot length. Under three feet, 0.010 inch per foot. Soft annealed tubing or small diameter long lengths may exceed these figures.
Concentricity — Mandrel Drawn
5 percent of the wall. The wall is calculated from the mean OD and mean ID after applying standard tolerances. 5 percent eccentricity equals 10 percent total indicator reading when chucked on the OD and gaged on the ID or vice versa
MECHANICAL PROPERTIES
|
||||
|
Grade
|
Minimum
Yield, PSI |
Minimum
Tensile, PSI |
Elongation
Percent in 2 In. |
Minimum
Hardiness Rockwell B |
|
C-1010
|
58,000
|
63,000
|
15
|
70
|
|
C-1012
|
58,000
|
63,000
|
15
|
70
|
|
C-1015
|
60,000
|
66,000
|
14
|
72
|
|
C-1016
|
61,500
|
67,000
|
13
|
73
|
|
C-1018
|
62,500
|
68,000
|
13
|
73
|
|
C-1020
|
65,000
|
71,000
|
11
|
73
|
|
C-1030
|
70,000
|
80,000
|
10
|
80
|
|
C-1110
|
58,000
|
63,000
|
15
|
70
|
|
C-1115
|
62,500
|
68,000
|
13
|
73
|
*Soft and intermediate annealed tubing is also available.
Reviews
No customer comments for the moment.
Summary
- Product Name:ASTM A512 Cold-Drawn Buttweld Carbon Mechanical Tubing suppliers
- Price: $ 0.00
- Product Width: 0.00 cm
- Product Height: 0.00 cm
- Product Depth: 0.00 cm
- Product Weight: 0.00 kg
- Description: ASTM A512 Cold-Drawn Buttweld Carbon Mechanical Tubing


